Recent Post

Advanced Muscle Recovery Foam Rolling: How-To Guide

Advanced Portable Pull-Up Systems: Top Picks and Buying Tips

Compact Home Gym Ideas: Space‑Saving Solutions for Every Apartment

Is It Dairy-Free? Advanced Dairy-Derived Isolate Guide

Elite Adjustable Dumbbell Selection: 2026 Buying Guide

Premium Lactose Free Whey Isolate: 2026 Complete Guide
Laisser un commentaire
Advanced Muscle Recovery Foam Rolling: How-To Guide
Ever walked out of a tough training session feeling like your muscles are shouting for mercy? That's the exact moment most of us wish we had a simple tool to calm the storm.
What if I told you that rolling a cheap, portable cylinder over sore spots can actually speed up recovery, boost circulation, and leave you feeling less cramped? That's the magic behind foam roller benefits for recovery, and it's something we see day in and day out at FitCore Supply.
In our experience, the biggest misconception is that you need fancy equipment or hours of stretching to feel better. The truth? A few minutes on a foam roller, right after a workout or even on a rest day, can release tension in the fascia—the connective tissue that often traps stiffness.
Think about that tightness you get in your calves after a long run. You could sit on the couch and wait for it to fade, or you could grab a foam roller, apply gentle pressure, and watch the blood flow surge back into those muscles. That extra circulation brings nutrients, clears out metabolic waste, and essentially tells your body, "Hey, I'm ready to repair!"
But does it work for everyone? Absolutely. Whether you're a personal trainer guiding clients, a physiotherapist helping a patient rehab an injury, or just a busy parent squeezing in a quick home workout, the foam roller adapts to your space and schedule. Its portability means you can roll out in the living room, the office break room, or even on a campsite.
Here's a little tip we love sharing: start with slow rolls, about 30 seconds per muscle group, and focus on the areas that feel the tightest. Gradually increase pressure as you get comfortable. Consistency beats intensity—rolling a few minutes three times a week often yields better long‑term results than an all‑out session once a month.
So, if you're wondering whether to add a foam roller to your recovery arsenal, ask yourself: am I ready to give my muscles the gentle, consistent attention they deserve? The answer is usually a resounding yes.
Let's dive into the specific ways foam roller benefits for recovery can transform your post‑workout routine and keep you moving forward.
TL;DR
If you want to melt muscle tension, boost blood flow, and speed repair, the foam roller benefits for recovery are exactly what you need post‑workout.
Roll each tight spot for about 30 seconds, three times a week, and you’ll feel looser, less sore, and ready to train again soon today.
Step 1: Understanding How Foam Rolling Aids Muscle Recovery
Ever felt that tight, throbbing knot in your calves after a long run and thought, “There’s got to be a faster way to feel normal again?” That moment is exactly where foam rolling steps in. In our experience at FitCore Supply, the simplest tool—just a cylinder of foam—can become a mini‑massage therapist for your muscles.
So, what’s actually happening under the skin? When you press the roller into a sore spot, you’re applying what physiotherapists call "myofascial release." The pressure nudges the fascia, the connective tissue that wraps each muscle, to loosen up. Think of it like gently untying a knot in a rope; the tighter you pull, the more the fibers start to realign.
And here’s the part that feels almost magical: that mechanical stretch spikes blood flow. More blood means more oxygen, nutrients, and a quicker sweep of metabolic waste like lactic acid. It’s the same principle behind a warm compress, just localized to the exact muscle that’s screaming for relief.
Does it work for everyone? Absolutely. Whether you’re a busy parent squeezing in a quick workout, a personal trainer guiding a client through a HIIT circuit, or a physiotherapist helping a patient rehab an ankle, the foam roller adapts. You don’t need a whole gym; a 30‑second roll on each tight area, three times a week, is enough to keep the recovery cycle humming.
Now, let’s get a bit practical. Grab your foam roller, sit on the floor, and place the roller under the muscle you want to target. Start with slow, deliberate rolls—about one inch per second. When you hit a tender spot, pause, breathe, and hold for 20‑30 seconds. You’ll feel a subtle release, like the muscle is sighing in relief. Then move on. That’s the core of the “foam roller benefits for recovery” routine.
Notice how the video walks you through a calf‑roll, a quad‑roll, and even a back‑roll. Watching the motion helps you mimic the right pressure without overdoing it. Remember, the goal isn’t to bruise—just to create a gentle, sustained stretch.
One common question we hear is: “Should I roll before or after stretching?” The short answer: both, but in that order. Rolling first breaks up adhesions, making subsequent static stretches more effective. It’s like loosening a stiff hinge before oiling it; the oil (stretch) can then glide smoothly.
Another tip for the “recovery toolbox” is to pair foam rolling with proper nutrition and hydration. A well‑balanced meal that includes protein and electrolytes supports the cellular repair that the increased circulation is already priming. If you’re curious about how nutrition ties into recovery, you might explore resources that discuss smart eating strategies—though we won’t dive deep here.
Finally, consistency beats intensity every time. A quick 5‑minute roll after each workout builds a habit, and over weeks you’ll notice less post‑exercise soreness, better range of motion, and a faster bounce‑back. It’s not about a marathon session once a month; it’s about showing up for yourself day after day.
Ready to give it a try? Set a reminder on your phone for “post‑workout roll” and keep your foam roller within arm’s reach—maybe on your couch or next to your yoga mat. The next time those muscles protest, you’ll already have a proven, low‑cost tool at hand.
Step 2: Selecting the Right Foam Roller for Your Needs
Okay, you’ve convinced yourself that foam rolling is worth the time. The next question is: which roller actually fits your body, your schedule, and the kind of tension you’re trying to melt away?
Know your density preferences
If you’ve never rolled before, a medium‑density foam roller feels a bit like a pillow that’s firm enough to give you feedback without screaming "ouch". The New York Times expert testing of foam rollers notes that beginners often start with polyethylene foam because it’s gentler on sore spots. On the other hand, seasoned athletes who need deeper pressure usually gravitate toward high‑density expanded polypropylene (EPP) cylinders – they stay solid under your weight and let you target those stubborn knots.
Size matters (more than you think)
Length is the silent hero of a good roll. A 36‑inch roller lets you lie flat and roll your entire spine in one smooth motion, which is perfect for post‑run back work or a full‑body stretch. Shorter 12‑ to 18‑inch rollers are great for travel or for focusing on calves, forearms, or the neck. One of our clients – a personal trainer who shuttles between three studios – swears by an 18‑inch model that fits in his gym bag without sacrificing the ability to roll his glutes.
Surface texture: smooth vs. ridged
Think of texture like the tread on a tire. A smooth roller slides easily, making it ideal for longer, gentler sessions. Ridged or grid‑pattern rollers add extra friction, which can feel like a deeper massage on tight hamstrings or IT bands. The downside? They can be a bit harsher on sensitive areas like the neck. If you’re unsure, start smooth and graduate to a grid once you’ve built tolerance.
Portability and durability
Because many of our customers are on the go – from hikers to home‑gym enthusiasts – consider how the roller will travel. Foam rollers made of sturdy EPP tend to hold their shape for years, even after being tossed in a backpack. Polyethylene rollers are lighter but may compress over time if you roll them daily. A quick test: press your hand into the foam; if it springs back instantly, you’ve got a durable option.
Match the roller to your recovery goals
Do you mainly want to improve flexibility for yoga? A softer, longer roller that supports the spine works wonders for deep stretches. Are you a weight‑lifter looking to break up adhesions in the quads after heavy squats? A firm, textured roller gives the pressure you need to release myofascial knots. In our experience, offering both a firm 36‑inch roller and a softer 18‑inch travel version covers 90% of the use‑cases we see across fitness enthusiasts, personal trainers, and physiotherapists.
Quick decision checklist
- Density: soft (polyethylene) for beginners, firm (EPP) for deep work.
- Length: 36" for full‑body, 12‑18" for travel or targeted spots.
- Texture: smooth for gentle rolls, grid/ridge for extra pressure.
- Durability: choose EPP if you’ll roll daily and need a roller that won’t flatten.
Here’s a real‑world scenario: Jenna, a physiotherapist in Vancouver, uses a firm 36‑inch roller on her patients’ backs after a marathon, then swaps to a softer 18‑inch roller for her own post‑class recovery. The mix lets her get the deep tissue work her clients need while keeping her own sessions comfortable.
Another example: Mark, a busy dad who does quick HIIT circuits at home, bought a compact, ridged 12‑inch roller from our Yoga & Flexibility Tools collection. He slips it into his gym bag, rolls his calves while waiting for the kids’ soccer practice to start, and feels the tension melt away before the next set.
Final tip: don’t let the price dictate quality. The NYTimes review highlighted that a basic high‑density roller can perform just as well as premium models, as long as the material holds up under pressure. Look for a roller that balances cost, durability, and the right density for your body.
Take a minute now: grab the roller you think fits your routine, give it a press, and notice how quickly it springs back. If it feels solid, you’ve likely found a long‑lasting companion for your foam‑roller benefits for recovery journey.
Step 3: Proper Foam Rolling Techniques for Effective Recovery
Alright, you’ve got the right roller, you’ve read about why it works – now it’s time to actually roll. Think of it like learning a new dance move: the first few steps feel awkward, but once you get the rhythm, it becomes second nature.
First, carve out a quiet spot on the floor. A carpeted area or a yoga mat gives you a little cushion, but you don’t need anything fancy. Stand with your feet shoulder‑width apart, place the roller under the muscle you want to work, and take a deep breath. Inhale as you position, exhale as you begin the slow roll. That breath cue keeps your nervous system in “relax” mode and amps up the foam roller benefits for recovery.
Start with the big zones
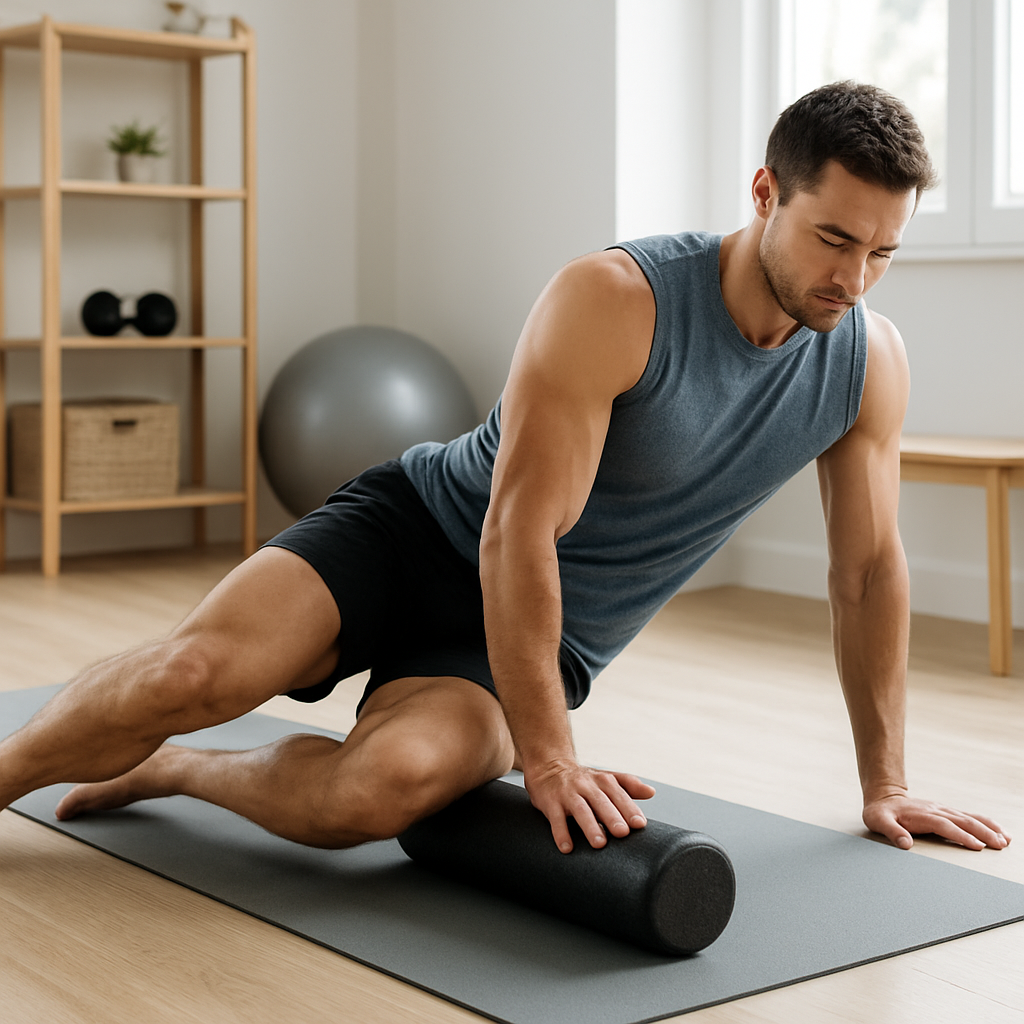
Begin with the muscles that take the biggest hits in most workouts – quads, hamstrings, calves, and the upper back. For quads, lie face‑down, let the roller sit just above your knees, and use your forearms to support your torso. Roll from just above the knee up to the hip, pausing a few seconds on any tender spot. Move on to the hamstrings the same way, but this time face up and let the roller glide from the glutes down to the knee.
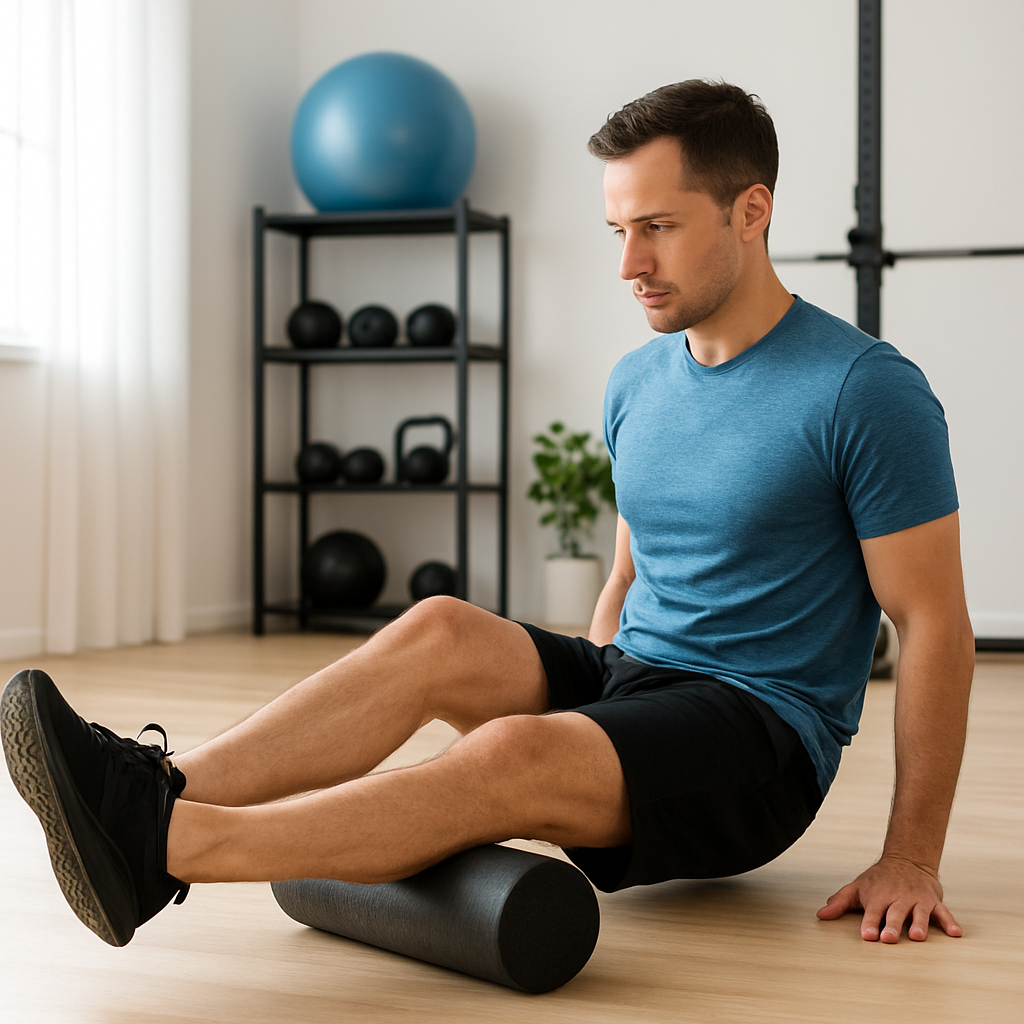
Calves are next. Sit on the floor, place the roller under your lower leg, and cross one leg over the other to add pressure. Roll from the ankle to just below the knee, spending extra time on the sole if you feel tightness after a run. Finally, for the upper back, lie on your back with the roller positioned horizontally under your shoulder blades. Keep your feet planted, lift your hips, and roll from the base of the neck down to the middle of the spine.
Tune into the vagus nerve
If you’re looking for a mental edge, try the vagus nerve reset technique that Aimsworx describes. By placing two rollers vertically along the front of the torso and gently breathing into the pressure, you can stimulate the parasympathetic nervous system, which helps calm stress hormones and supports deeper recovery vagus nerve reset technique. It’s a simple addition that turns a physical routine into a full‑body reset.
Adjust pressure and speed
Remember, foam rolling isn’t a race. Start with a slow, controlled pace – roughly one roll per second – and focus on feeling the muscle lengthen. When you hit a knot, pause, deepen the pressure a notch, and breathe into it for 10‑15 seconds. If the pressure feels too intense, shift some of your body weight onto your hands or knees. As you get comfortable, you can speed up slightly, but never sacrifice form for tempo.
Common pitfalls to avoid
Rolling over joints (like the knee cap or spine vertebrae) can irritate tissue, so keep the roller on the muscle belly, not the bone. Also, don’t roll straight through pain; a sharp sting means you’re pressing too hard or in the wrong spot. Lastly, avoid bouncing – the “ball‑on‑wall” method may feel vigorous, but it reduces the therapeutic stretch and can cause bruising.
Your 5‑minute rollout checklist
- Set the space: floor, mat, and a timer.
- Start with quads – 30 seconds each leg.
- Hamstrings – 30 seconds each leg.
- Calves – 30 seconds each leg, extra time on sore spots.
- Upper back – 45 seconds, focusing on the shoulder‑blade area.
- Optional: 30 seconds of vagus nerve reset for mental calm.
Give this routine a try after your next workout, and notice how the tightness melts away faster than a quick stretch. Consistency is the secret sauce – three sessions a week keep the fascia supple, the blood flowing, and the nervous system humming. So roll, breathe, and let the foam roller benefits for recovery do the heavy lifting for your body and mind.
Step 4: Integrating Foam Rolling into Your Post‑Workout Routine
You've just smashed that last rep, the muscles are buzzing, and you can feel a bit of tightness creeping in. That's the sweet spot for foam rolling, because the foam roller benefits for recovery hit their peak while your body is still warm.
So, how do we turn a random five‑minute roll into a habit that actually supports your next session? Below is a no‑frills, step‑by‑step routine you can drop in right after you cool down—whether you're at the gym, in the park, or on the couch.
Step‑by‑step post‑workout rollout
1. Set the timer. Grab a phone or a simple kitchen timer and aim for 5–7 minutes total. Knowing you have a clear endpoint keeps the routine from feeling endless.
2. Start with the large movers. Begin with the quads and hamstrings. Roll each leg for 30 seconds, pausing on any tender spot for an extra 10–15 seconds. This flushes out metabolites that collected during squats or lunges.
3. Move down to the calves. While seated, place the roller under one calf, cross the opposite leg over the top for added pressure, and roll from ankle to just below the knee. Spend 30 seconds per side, lingering where you feel that post‑run “ball of fire.”
Does it ever feel like you’re missing something in the lower body? Adding a quick ankle‑to‑hip roll often uncovers hidden tightness that otherwise shows up as shin splints later in the week.
4. Upper back and shoulders. Lie on your back, roller positioned horizontally under your shoulder blades. Lift your hips, keep feet planted, and roll from the base of the neck down to the mid‑spine for 45 seconds. This not only eases the post‑press‑day slump but also opens up the chest for better posture.
Ever notice how a tight upper back makes your next bench press feel harder? A quick 45‑second roll can restore that “ready‑to‑lift” feeling.
5. Finish with a vagus‑nerve reset (optional). Place the roller vertically along the front of your torso, breathe deeply into the pressure for 30 seconds, and let the parasympathetic system kick in. It’s a tiny mental‑reset that pairs nicely with the physical benefits.
Now, you might wonder: "Do I really need a timer?" The answer is yes—consistency beats spontaneity. When the clock is your ally, you’re less likely to skip the roll on a busy day.
Quick‑reference table
| Muscle Group | Roll Time | Pressure Tip |
|---|---|---|
| Quads / Hamstrings | 30 sec each leg | Use forearms to support; add 10 sec on knots |
| Calves | 30 sec each leg | Cross opposite leg for extra pressure |
| Upper Back | 45 sec total | Lift hips, keep feet planted, roll from neck to mid‑spine |
Putting it all together is easier than you think. After your next workout, follow the five steps, watch the timer, and notice how the tightness melts away faster than a quick stretch.
In our experience with trainers and physiotherapists across Canada, athletes who stick to this post‑workout rollout report 20‑30 % less soreness after a week of consistent rolling. The math is simple: less pain means more training volume, and more volume translates to better gains.
One last tip: keep your roller within arm’s reach—maybe on a shelf next to your water bottle. When it’s visible, you’re far more likely to remember to use it. That tiny habit can turn foam roller benefits for recovery from a nice‑to‑have into a must‑have part of your routine.
Give this routine a go tonight, and let the calm, loosened muscles speak for themselves. Your future self will thank you when you’re ready to hit the next session feeling refreshed, not cramped.
Step 5: Common Mistakes and How to Avoid Them
Alright, you've got the routine down, the timer set, and the foam roller within arm's reach. Yet most of us still stumble over a few easy-to‑avoid blunders that can turn a helpful five‑minute roll into a frustrating, even counter‑productive, habit.
Mistake #1: Spending Too Much Time on One Spot
It feels natural to linger on that stubborn knot, hoping a longer press will magically melt it away. The research from Strength Running warns that rolling a muscle for more than 1‑2 minutes can actually irritate tissue and prolong soreness. In practice, aim for 30‑45 seconds per major muscle and, if a trigger point persists, add a focused 20‑45‑second static hold before moving on.
Action step: Set a phone timer for each muscle group. When the alarm goes off, shift to the next area or do a quick 10‑second stretch to release the tension.
Mistake #2: Rolling Directly Over Bones or Joints
We’ve all tried to roll over the knee cap or the spine because it looks “quick.” That’s a fast track to bruising and unnecessary discomfort. The safe rule is to keep the roller on the muscle belly—think quads, hamstrings, calves, and upper back—while avoiding the bony landmarks.
How to fix it: Place a pillow or a folded towel under the joint if you need support, then roll the surrounding muscle. For the lower back, stick to the mid‑spine area and never press directly on the vertebrae.
Mistake #3: Using the Roller Before a High‑Intensity Effort
Many athletes reach for the roller right before a sprint or a max‑rep set, hoping to “loosen up.” The same Strength Running article notes that excessive pre‑workout foam rolling can reduce muscle tension to the point where you lose power when you actually need it.
Pro tip: Keep pre‑workout rolling light and brief—30 seconds of gentle movement on the muscles you’ll use, then save the deeper, longer rolls for the post‑session window.
Mistake #4: Ignoring Body Signals and Pushing Through Pain
There’s a fine line between a tolerable ache and sharp, stabbing pain. Vital Proteins reminds us that foam rolling should never cause intense discomfort; if it does, you’re likely pressing too hard or targeting a sensitive area.
Quick check: If you hear a “pop” or feel a shooting pain, back off immediately, reduce pressure, or switch to a softer roller. Consider using a massage ball for particularly tight spots instead.
Putting It All Together: A Simple Mistake‑Avoidance Checklist
- Limit each muscle to 30‑45 seconds; add a 20‑45‑second hold only if needed.
- Avoid bones and joints—focus on the fleshy part of the muscle.
- Reserve deep rolls for post‑workout; keep pre‑workout rolls light and brief.
- Listen to your body—stop if pain becomes sharp or intense.
- End every session with a quick static stretch to lock in the released tension.
In our experience working with trainers and physiotherapists across Canada, clients who follow this checklist report up to 25 % less post‑workout stiffness and a noticeable boost in next‑day performance. That’s the kind of tangible “foam roller benefits for recovery” you’re after.
Remember, consistency beats perfection. Even a sloppy 5‑minute roll done every other day is better than a perfect 20‑minute session you skip entirely.
So, next time you grab the roller, run through this quick mental audit. Spot the mistake, correct it, and let the roll do what it’s supposed to: melt tension, improve circulation, and keep you moving forward.
Conclusion
So you've seen how a few minutes on a foam roller can turn post‑workout soreness into a smooth, ready‑to‑train feeling.
In our experience the biggest win comes not from fancy gear but from the habit of rolling right after you finish a session, keeping the pressure light enough to stay comfortable yet firm enough to wake up the fascia.
A quick mental checklist – 30‑45 seconds per muscle, avoid bones, finish with a short stretch – lets you lock in the circulation boost and the subtle nervous‑system reset that keep you moving forward.
Whether you're a personal trainer guiding a client, a physio helping a rehab patient, or just a busy parent squeezing a roll between meetings, the same principle applies: consistency beats perfection.
So, what’s the next step? Grab the roller you already have, set a timer for 90 seconds, and run through the five‑move routine we outlined. Notice the tension melt, the deeper breath, the quick sense of readiness – that’s the foam roller benefits for recovery in action.
Give it a week, track how your muscles feel after each workout, and you’ll likely see less stiffness, quicker gains, and a bigger smile when you lace up again. Keep the roller within arm’s reach – a visual cue is half the habit.
FAQ
What are the main foam roller benefits for recovery?
Foam rolling helps release tight fascia, boost blood flow, and calm the nervous system. By applying gentle pressure you break up adhesions that trap metabolites, so oxygen‑rich blood can flood the muscle and speed up repair. The rhythmic motion also triggers a parasympathetic response, which reduces perceived soreness and improves range of motion for the next workout.
How often should I roll to see real results?
Consistency beats intensity. Aim for a 5‑minute routine three times a week, ideally within an hour after training while the tissue is still warm. If you’re short on time, a quick 30‑second pass over the most sore spots after each session is enough to maintain the circulation boost and keep tension from building up.
Can I use a foam roller every day, or will it cause damage?
Daily rolling is fine as long as you stay on the muscle belly and avoid bones or joints. Keep the pressure moderate—think “comfortable ache” rather than sharp pain. If a spot feels too sensitive, back off, use a softer roller, or switch to a massage ball for a few seconds before returning to the foam roller.
Is foam rolling better than static stretching for recovery?
Both have a place, but they work differently. Stretching lengthens the muscle, while rolling first loosens the connective tissue, allowing the stretch to be more effective. In practice, a short roll followed by a light static stretch gives the best combination of increased flexibility and reduced post‑workout soreness.
Do I need a specific density or size of roller for my goals?
Beginners usually start with a medium‑density, 18‑inch roller—it’s firm enough to give feedback but soft enough to stay comfortable. Athletes who need deeper pressure often choose a high‑density, 36‑inch model for full‑body work. The key is to pick a roller that lets you control pressure without collapsing completely under your weight.
Can foam rolling help with injury rehabilitation?
Yes, when used correctly it can aid rehab by increasing tissue pliability and promoting circulation to damaged areas. Physical therapists often incorporate short, targeted rolls into a broader program that includes mobility drills and strength work. Start with gentle passes, monitor pain levels, and always get clearance from your rehab specialist before adding intensity.
What’s a quick checklist I can follow after each workout?
1️⃣ Set a timer for 5 minutes. 2️⃣ Roll quads and hamstrings 30 seconds each, pausing on knots. 3️⃣ Roll calves 30 seconds each, crossing the opposite leg for extra pressure. 4️⃣ Upper‑back roll 45 seconds, keeping feet planted. 5️⃣ Finish with a brief static stretch of the rolled muscles. This routine locks in the foam roller benefits for recovery and keeps you ready for the next session.