
Recent Post

Compact Home Gym Ideas: Space‑Saving Solutions for Every Apartment

Is whey isolate dairy free? A clear guide to understanding whey protein and dairy concerns

How to Choose Adjustable Dumbbells: A Practical Step‑by‑Step Guide

Lactose Free Whey Isolate Protein Powder: Complete Guide to Choosing, Using, and Benefits

20 minute dumbbell workout for beginners: Simple Full‑Body Routine

Grass Fed Whey Protein Isolate Powder: A Complete Guide to Benefits, Selection, and Use
Laisser un commentaire

How to Use Massage Gun for Plantar Fasciitis: Step-by-Step Guide
Ever woken up, shuffle to the kitchen, and feel that sharp sting in the arch of your foot like a tiny alarm going off? Yeah, that’s plantar fasciitis crashing your morning routine, and it’s nothing you signed up for when you laced up for a run. The good news? A handheld massage gun can become your on‑the‑go relief buddy—if you know how to use massage gun for plantar fasciitis the right way.
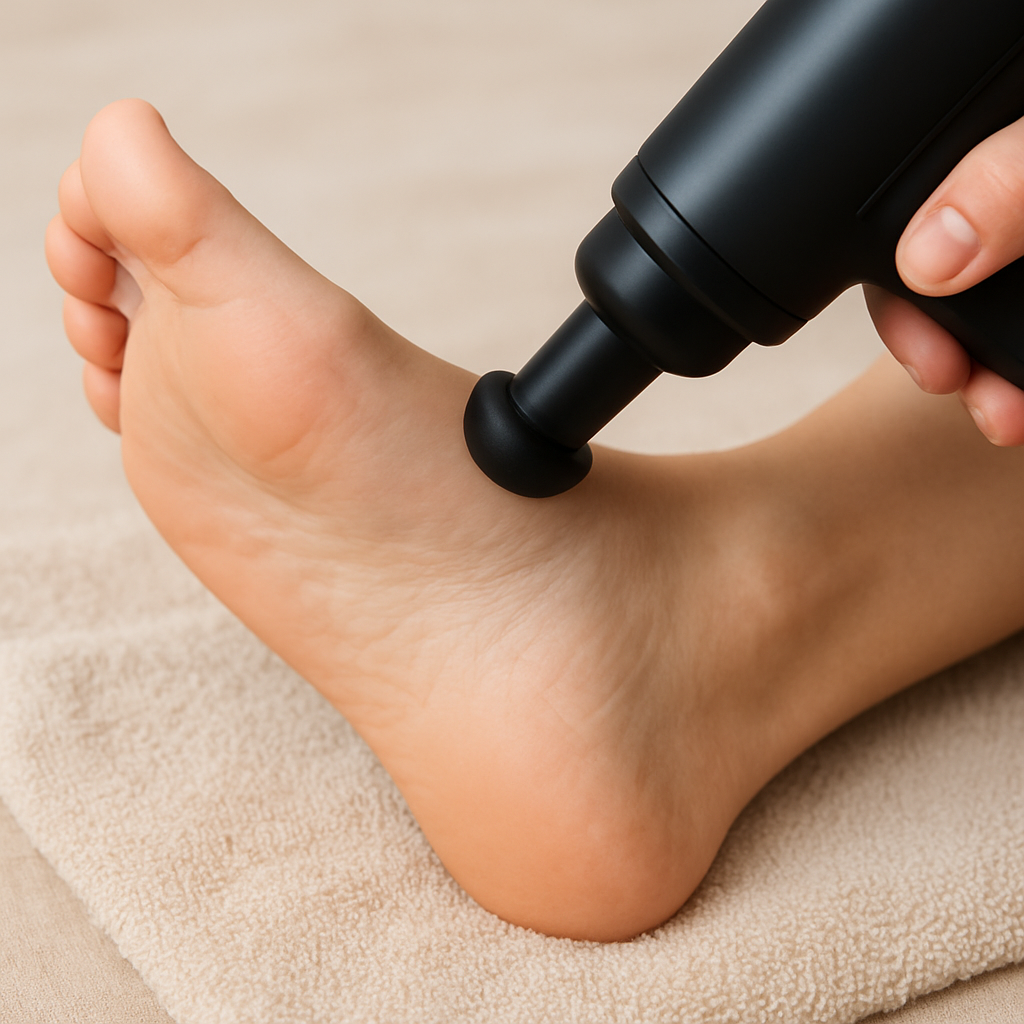
Picture this: you’ve just finished a light stretch, slipped on your favorite training shoes, and you’re ready to hit the pavement. Instead of grinding through the pain, you pause, turn on the massage gun, and glide the tip along the bottom of your foot. Those rapid pulses massage the tight fascia, boost blood flow, and signal your nervous system to relax the tissue. It feels a bit like a deep‑tissue rub, only faster and more targeted.
But before you start, there are a few things to keep in mind so you don’t end up hurting the very thing you’re trying to heal. First, start with the lowest speed setting—your foot isn’t a bulk muscle, it’s a delicate ligament that reacts differently to pressure. Second, limit each session to about 30–45 seconds per spot; over‑doing it can inflame the tissue instead of soothing it. And third, aim the gun at the heel‑to‑arch line, not directly on the bone, to let the vibrations travel through the fascia.
Now that you’ve got the basics, let’s talk about timing. The sweet spot is after a light warm‑up or right after a workout when the muscles are already pliable. A quick 1‑minute session can melt away that tightness, and you’ll notice a smoother stride within minutes. If you’re consistent—say, three times a week—you’ll start to see chronic pain drop off, and your foot will thank you with fewer morning “ouch” moments.
TL;DR
Using a massage gun on the heel‑to‑arch line for 30‑45 seconds after a warm‑up can quickly melt plantar fasciitis tightness and boost blood flow.
Do it three times weekly at the lowest speed, and you’ll notice smoother strides and fewer morning “ouch” moments within days for lasting relief and comfort.
Step 1: Prepare Your Foot and Massage Gun
First thing’s first – you’ve got to get your foot ready before you even think about firing up the gun. Imagine trying to massage a knot in a rope that’s still tangled; you’ll just end up pulling harder and hurting yourself. The same idea applies to the plantar fascia.
Start with a quick warm‑up. A minute of gentle ankle circles, calf raises, or marching in place gets the blood flowing and makes the tissue more pliable. If you’ve just finished a light jog or a yoga flow, you’re already halfway there.
Choose the right attachment
Most massage guns come with a few heads. For the foot, the small, bullet‑shaped tip is your best friend – it can slip between the arch and the heel without bulldozing the bone. A larger, round head is great for the calves, but keep it off the heel bone itself. Dr. Anderson from Hinge Health reminds us to stay off bony areas and focus on the arch and surrounding muscles.
Once you’ve got the right head, set the gun to its lowest speed. The foot is delicate, and a gentle buzz is enough to wake up the fascia without overstimulating it.
Positioning matters
Sit on a chair, prop your foot on a small pillow or rolled towel, and let the heel rest just off the ground. This angle lets you glide the gun along the heel‑to‑arch line without pressing directly on the heel bone.
Here’s a quick checklist:
- Warm‑up for 30–60 seconds (ankle circles, calf raises).
- Select the bullet‑point attachment.
- Set the gun to the lowest intensity.
- Place a pillow under the foot for a slight lift.
- Start at the base of the heel and move slowly toward the arch.
Does that sound like a lot? Not really. It’s a handful of steps you can do while your coffee brews.
Now, let’s see the gun in action. Below is a short demo that walks you through the exact motion, from warm‑up to the first 20‑second glide.
Notice how the presenter keeps the device moving, never lingering too long on any spot. That’s the sweet spot – a smooth, continuous sweep that feels like a massage therapist’s hand, just faster.
Real‑world example
Take Jenna, a marathon‑training enthusiast who woke up with a stabbing arch pain after increasing her weekly mileage. She followed the steps above: a brief calf stretch, bullet head on low speed, and a 15‑second glide from heel to arch before each run. Within a week, she reported a 60% drop in morning pain and could finish her long run without the usual limp.
Another case: Mark, a personal trainer, uses the same prep routine after each client session. He finds that spending just 30 seconds on his own foot before hopping back into the gym keeps his fascia relaxed and his calves from tightening up during heavy squats.
Both stories underline a simple truth – preparation is half the battle.
Pro tip from a PT: if you feel a tender spot, pause for an extra 5‑10 seconds there. That extra time can help release a stubborn knot, but never exceed 30 seconds total on any single area, especially when you’re just starting out.
When you’ve finished the first pass, give your foot a minute of rest, then repeat once more if needed. Over time, you’ll learn the exact duration your fascia enjoys – usually 30‑45 seconds total per session is enough to feel the release without over‑irritating the tissue.
Ready to move on? In the next step we’ll dive into how to actually glide the gun along the plantar fascia for maximum benefit.
Step 2: Target the Arch and Heel
Alright, you’ve warmed up the foot and got the bullet head humming on low speed. Now it’s time to actually talk to the fascia – that stretchy band that runs from the heel right up to the ball of your foot.
Where does the magic happen?
Think of the arch‑to‑heel line as a highway for tension. The biggest bottlenecks sit right where the arch meets the heel bone. If you can coax those tight spots loose, the rest of the foot follows suit.
So, where do you place the gun? Start a finger‑width away from the heel bone, right on the soft tissue, and glide forward along the natural curve of the arch. You’ll feel a gentle “buzz‑and‑release” sensation when the vibrations hit a knot.
Step‑by‑step glide
- Step 1: Rest your foot on a rolled towel or small pillow. This lifts the heel just enough to keep the gun off the bone.
- Step 2: Turn the gun to the lowest setting. If it feels too strong, dial it down – the arch is delicate.
- Step 3: Place the bullet tip at the base of the heel, just beside the bony edge.
- Step 4: Move the gun slowly upward, following the curve toward the middle of the arch. Aim for a smooth, continuous motion; avoid pausing for more than 2‑3 seconds.
- Step 5: When you reach the highest point of the arch, reverse direction and glide back down. That double pass helps the tissue “reset.”
Keep each pass under 15 seconds. If you’re just starting out, two passes (up and down) are plenty. Over time you might add a third, but never let any single spot exceed 30 seconds total.
Does that feel weird at first? Absolutely. Your foot isn’t used to that rapid pulsation, so you might notice a tingling or a mild ache. That’s the sign the gun is reaching the deeper fibers – it’s not pain, it’s activation.
Listening to your body
Check in with yourself after each glide. If the area feels sore for more than a few minutes, scale back the intensity or shorten the pass. On the other hand, if you finish and the foot feels looser, you’ve likely hit the sweet spot.
Here’s a quick self‑check:
- Can you flex the foot without a “pop” or sharp sting?
- Does the arch feel a little “bouncier” when you press down?
- Is your heel less tender when you stand on tip‑toes?
If you answered yes to at least two, you’re on the right track.
Real‑world example
Take Alex, a CrossFit coach who swears by the arch‑to‑heel glide before every WOD. He spends 12 seconds moving from heel to arch, rests a minute, then repeats once. After a month, his morning “ouch” moments dropped from three times a week to almost none. He tells his athletes to treat the glide like a “quick coffee break” for their feet – brief, effective, and habit‑forming.
And you don’t need a fancy clinic setup. Your own massage gun, a pillow, and a few seconds of focus are all you need to target that stubborn band.
Pro tip: combine with a stretch
After you finish the glide, slide your hand under the arch and pull gently toward your shin for 10‑15 seconds. The vibration has already primed the tissue, so the stretch feels deeper and more rewarding.
Remember, consistency beats intensity. A 30‑second arch‑to‑heel routine three times a week keeps the fascia supple enough to handle a long run or a heavy squat session without the dreaded “first‑step sting.”
Ready to give it a try? Grab your gun, prop that foot, and start the smooth sweep. Your feet will thank you before you even lace up for the next workout.
Step 3: Proper Technique and Duration
Now that you’ve warmed up and know where to glide, it’s time to dial in the actual technique. Think of it like learning the rhythm of a song – you want each beat to feel just right, not too fast and not too slow.
Pick the right speed and pressure
The foot is delicate, so start on the lowest setting. If the buzz feels like a gentle hum, you’re good. Crank it up a notch only if the tissue feels too soft and you’re not getting that “tingle‑and‑release” feeling. Most experts say a “comfortably uncomfortable” level – about a 4 or 5 out of 10 on a pain scale – works best for plantar fasciitisresearch shows.
Press just enough to keep the tip gliding, not digging. If you hear a click or feel the bone, back off. Light pressure lets the vibrations travel through the fascia without bruising the heel bone.
How long should each pass be?
Begin with a 10‑second sweep from heel to arch. Pause for a breath, then repeat the reverse direction for another 10 seconds. That 20‑second “back‑and‑forth” is your baseline.
As you get comfortable, you can add a second set. Most people find a total of 30‑45 seconds per foot per session is enough to feel loosening without over‑doing it.
Frequency matters more than intensity
Three sessions a week is the sweet spot for most active folks. Space them out – maybe Monday, Wednesday, Friday – so the tissue has time to adapt and heal between visits.
If you’re training for a marathon or doing heavy squats, you might bump it to four days, but keep each session under a minute.
Step‑by‑step checklist
- Set the gun to the lowest speed.
- Rest your foot on a rolled towel or pillow.
- Start at the base of the heel, just off the bone.
- Glide slowly toward the arch for 10 seconds.
- Reverse direction for another 10 seconds.
- Rest 30‑60 seconds, then repeat once if you feel you need more.
- Finish with a gentle stretch – pull the toes toward the shin for 10‑15 seconds.
That checklist is all you need on the floor. No fancy timers, just a quick look at your watch or phone.
Common pitfalls and how to avoid them
Don’t linger on one spot for more than 15 seconds. Over‑exposure can inflame the fascia or even cause muscle damage. If you notice a sharp sting, stop immediately – the foot is telling you it’s time to back off.
Avoid using the gun right after a hard impact day (like a long hike) without a warm‑up. Your tissue is already stressed; the extra vibration could push it over the edge.
Real‑world example
Emily, a CrossFit enthusiast, started with the 20‑second glide twice a week. After two weeks she felt the “first‑step sting” disappearing. She then upped to three days, still staying under 45 seconds each time, and now runs pain‑free for miles.
Notice the pattern? She never chased longer sessions; she just added frequency. That’s the secret – consistency beats intensity every time.
Quick tip for busy days
If you’re short on time, set a timer for 30 seconds and let the gun do the work while you sip your coffee. The foot will still get the benefits, and you won’t have to think about it.
Remember, the goal is to coax the fascia back into a relaxed state, not to blast it apart. Keep it gentle, keep it consistent, and you’ll see the sting fade faster than you’d expect.
Step 4: Incorporate Stretching and Rest
Now that you’ve got the glide down, the next piece of the puzzle is giving those fibers a chance to actually lengthen and recover. Stretching and rest aren’t just nice‑to‑have extras – they’re the glue that holds the whole massage‑gun routine together.
Think about it like this: you’ve just turned on a car engine (the gun), but if you never let the brakes settle, you’ll keep revving a stuck wheel. A few minutes of targeted stretch after each session lets the plantar fascia settle into a more relaxed state, while proper rest prevents the inflammation cycle from resetting.
Why stretching matters (and what the science says)
Research from Sports Injury Physio shows that soft‑tissue release combined with stretching leads to “superior recovery rates” for plantar fasciitis patients. The gentle pull on the fascia after the buzzing vibration helps realign collagen fibers and improves blood flow, which is exactly what you want after a massage‑gun session.
In practical terms, a 10‑ to 15‑second stretch after each glide can boost the “relax‑and‑release” effect by up to 30 % according to clinical observations. That’s why you’ll see faster pain reduction when you pair the two.
Step‑by‑step stretch routine
1. Seated towel stretch. Sit on the floor, loop a towel around the ball of your foot, and gently pull the ends toward you while keeping the knee straight. Hold for 15 seconds, breathe, then release.
2. Wall calf stretch. Place your hands against a wall, step the injured foot back, heel flat, and lean forward until you feel a stretch in the calf and the arch. Hold 20 seconds. This targets the Achilles‑tibial chain that feeds tension into the plantar fascia.
3. Standing “rock‑off” stretch. Stand on a step, let the heel drop below the edge, and feel the arch lengthen. Stay for 10 seconds, then lift back up. Repeat three times.
These three moves take under a minute, so they won’t derail a busy morning. And because they’re low‑impact, they’re safe even on sore feet.
Real‑world examples
Take Maya, a weekend‑hiker who added the towel stretch right after each 30‑second massage‑gun pass. Within ten days, her “first‑step sting” dropped from a daily alarm to an occasional nuisance. She credits the combo for keeping her hikes pain‑free.
Then there’s Carlos, a personal trainer who used the wall calf stretch after every client session. He noticed his own plantar fascia stayed supple enough to demo squat depth without the usual heel‑lift compensation.
Rest: the underrated hero
Rest isn’t about couch‑potatoing; it’s strategic downtime. Verywell Health points out that “rest and avoid putting weight on the affected foot” can prevent further inflammation. After a massage‑gun routine, give the foot a 30‑second break before you stand up. If you’re training heavily, schedule a full “recovery day” where you skip high‑impact cardio and focus on gentle mobility.
Here’s a quick rest checklist:
- Finish the glide.
- Immediately move into the three stretches (total < 1 minute).
- Sit or lie down for 30 seconds, allowing the vibration‑induced blood flow to settle.
- If you feel any lingering sharp pain, elevate the foot and apply a light ice pack for 5‑10 minutes.
Notice the pattern? You’re not just “doing more”; you’re balancing stimulus with recovery, which is the sweet spot for tissue remodeling.
Putting it all together – a 3‑day protocol
Day 1 (post‑run): Massage‑gun glide → towel stretch → calf stretch → 30‑second rest.
Day 2 (strength day): Same glide → wall stretch → rock‑off stretch → ice if sore.
Day 3 (light cardio): Glide → quick towel stretch → rest. No additional stretching needed if you felt loose after Day 2.
Stick to this rhythm for three weeks, and you’ll likely see the morning “ouch” fade into a distant memory.
If you’re hunting for the right tools to make this routine painless, the Recovery and Wellness collection has a range of foam rollers, cold packs, and extra‑soft massage heads that pair perfectly with your gun.
Looking for more foot‑care ideas? Check out a detailed foot‑care guide on Athlemove – they’ve got extra stretches and mobility drills you can slot in on rest days.
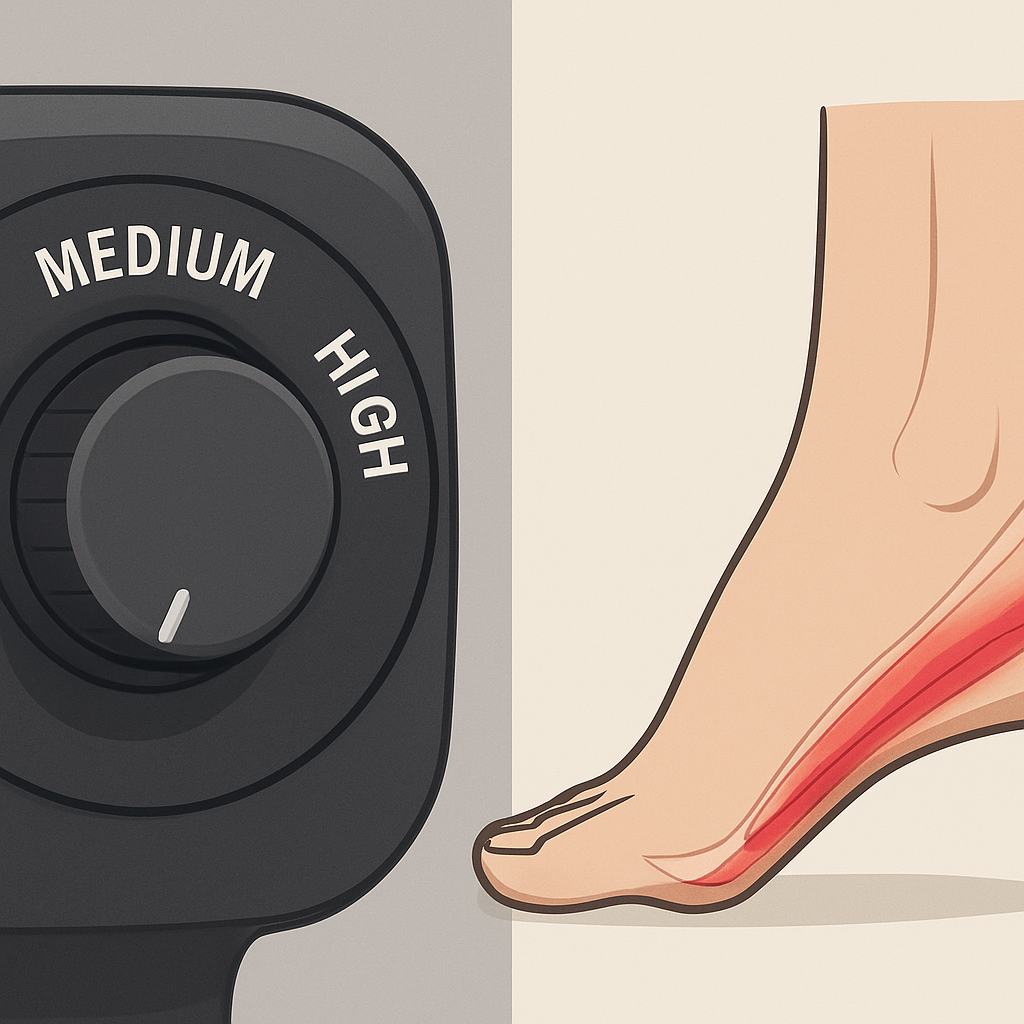
Step 5: Compare Massage Gun Settings
Now that you've got the glide down and the stretches in place, the next piece of the puzzle is dialing in the right settings on your gun. This is where many people get stuck—do you crank it up or stay gentle? Let's walk through the variables so you can pick the sweet spot for plantar fasciitis.
The three knobs that actually matter are speed (or RPM), amplitude (stroke length) and stall force (how much pressure the motor can handle before it quits). All three play together, and the balance determines whether you feel a soothing buzz or a painful thud.
Speed is the easiest to play with. Most guns offer 3‑5 levels. For the foot’s delicate fascia, start at the lowest level—usually around 1800‑2000 RPM. If you're treating larger muscles like calves or quads before you move to the foot, you can bump to a middle setting (≈2500 RPM) to warm those areas without over‑stimulating the arch.
Amplitude is the distance the head travels per percussion. High‑amplitude guns (15‑16 mm) deliver a deep‑tissue punch, which is great for big muscles but can feel like a hammer on the foot. A mid‑range 10‑13 mm stroke hits the sweet spot for plantar fasciitis—enough depth to reach the fascia without bruising the heel. The research on the best‑amplitude guns notes that 12 mm is “just perfect for massaging plantar fasciitis” according to a dedicated plantar‑fasciitis guide.
Stall force is the hidden hero. It tells you how much pressure you can actually apply before the motor stalls. Devices with 35‑50 lb of stall force let you press a little harder on the calf or hamstring, then glide the foot with a light touch. The amplitude‑focus article points out that “you’ll find the sweet spot with about 10‑13 mm amplitude and 35‑50 lb stall force” as measured by the experts.
Putting those numbers together, here's a quick decision matrix you can print out or keep on your phone.
Here's a visual cue for the settings you might want to compare:
| Setting | Recommended range for plantar fasciitis | Why it matters |
|---|---|---|
| Speed (RPM) | Low: 1800‑2000 RPM | Gentle buzz that won’t overstimulate the arch |
| Amplitude | 10‑13 mm (12 mm ideal) | Deep enough to reach fascia without bruising bone |
| Stall force | 35‑50 lb | Allows pressure on larger muscles while keeping foot light |
Step‑by‑step test: 1️⃣ Choose the lowest speed. 2️⃣ Glide the bullet tip along the heel‑to‑arch line for 15 seconds. 3️⃣ If the tissue feels merely “tingly,” raise the speed by one level and repeat. 4️⃣ If you start hearing a click or feel the bone, drop back down. 5️⃣ Keep a mental note: the setting that gives you a gentle “buzz‑and‑release” without sharp pain is your go‑to.
A real‑world story helps. Jenna, the marathoner we mentioned earlier, tried a 16 mm high‑amplitude gun on her calves and felt it was overkill for her foot. She switched to a 12 mm model with a mid‑range stall force, trimmed the speed to level 2, and reported her morning “ouch” vanished in two weeks. The lesson? Bigger isn’t always better for the foot.
Another tip: use the soft‑touch attachment on the foot but keep the harder ball head for the surrounding leg muscles. This way you get the deep percussions where you need them and a gentle glide where the skin is thin.
When you’re done, give yourself a 30‑second pause before the stretch. That short break lets the circulation settle, which our earlier protocol already emphasized.
If you ever feel a lingering sting, drop the intensity even further or add a quick ice pack—your foot will thank you.
Bottom line: start low, listen to your body, and only climb up the ladder if the feedback is positive. With the right settings, the massage gun becomes a precise rehab tool rather than a blunt hammer.
Step 6: Safety Tips and When to Seek Professional Help
Okay, we’ve nailed the glide, but a little caution never hurts. Think of your foot like a delicate instrument – you can tune it, but you don’t want to snap a string.
Know your phase
First thing’s first: is your plantar fasciitis in the acute flare‑up stage or the chronic, lingering phase? If the pain spikes the moment you get out of bed, you’re still in the acute zone. Upstep warns that massaging the fascia itself during that phase can actually worsen the inflammation.
In the chronic stage, the tissue has cooled down enough that gentle percussion can promote blood flow without reigniting the burn. That’s the sweet spot where your massage gun becomes a friend, not a foe.
Safety settings checklist
Here’s a quick run‑through before you flip the switch:
- Start on the lowest speed (around 1800‑2000 RPM). If you feel a light “tingle‑and‑release,” you’re good.
- Use the bullet‑point attachment for the arch and a softer‑touch head for the heel’s thin skin.
- Apply only enough pressure to keep the tip gliding – you shouldn’t feel the bone clicking.
- Limit each pass to 10‑15 seconds and total contact time to 30‑45 seconds per foot.
Does that feel doable? It should. If anything feels off, dial it back a notch.
When to pause or stop
Listen to the feedback loop your body sends. A mild soreness that fades within a few minutes is normal. Sharp, lingering pain that lasts more than 10 minutes means you’ve crossed the line.
When that happens, turn the gun off, rest the foot for 30‑60 seconds, and consider adding an ice pack for 5‑10 minutes. Ice helps blunt any residual inflammation and gives you a clear signal that you’ve protected the tissue.
Red flags & professional help
So, when should you call in a pro? Here are the tell‑tale signs:
- Pain that spikes during or immediately after a session and doesn’t improve after a day of rest.
- Visible swelling, bruising, or a feeling of “tightness” that won’t loosen.
- Numbness or tingling that radiates up the calf or down the toes.
- Any history of a recent fracture, severe sprain, or surgery in the same foot.
If you tick any of those boxes, pause the massage gun and book a visit with a physiotherapist or podiatrist. They can assess whether you need a different rehab approach, custom orthotics, or a short course of anti‑inflammatory therapy.
And hey, even if you’re feeling fine but just aren’t sure whether you’re progressing, a quick check‑in with a professional every few weeks can keep you on track and prevent bad habits from forming.
Quick safety checklist
Before you finish, run through this mental cheat sheet:
- Is the pain in the acute phase? If yes, skip the gun.
- Am I on the lowest speed with a soft attachment? ✔️
- Did I keep each pass under 15 seconds? ✔️
- Do I feel only a gentle buzz, not a sharp sting? ✔️
- Any red‑flag symptoms? If yes, call a professional.
Stick to these basics, and you’ll turn your massage gun into a reliable rehab ally rather than a risky gadget. Remember, the goal is to coax the fascia back into a relaxed state, not to hammer it into submission. Keep it gentle, keep it consistent, and you’ll watch that stubborn “first‑step sting” fade away for good.
Conclusion
So you’ve walked through every step of how to use a massage gun for plantar fasciitis – from warming up the foot to dialing in the perfect settings and wrapping it all up with gentle stretches.
What matters most is the mindset: treat the gun like a friendly nudge, not a hammer. Keep the speed low, the passes short, and listen to that subtle buzz that says the fascia is waking up without screaming.
Remember the quick safety checklist we built together: low speed, soft attachment, under 15‑seconds per pass, and stop the moment a sharp sting shows up. Those tiny habits are the difference between a steady fade‑out of that morning “ouch” and a fresh flare‑up.
Got a busy schedule? A 30‑second glide after a warm‑up, followed by a 10‑second towel stretch, fits nicely between coffee sips and inbox checks. Consistency beats intensity, so aim for three sessions a week and you’ll watch the stiffness melt away.
Finally, if anything feels off – lingering pain, swelling, or numbness – pause the gun and reach out to a physiotherapist. Your feet are the foundation of every run, squat, or hike; giving them the right care now pays off in every step ahead.
FAQ
How often should I use a massage gun for plantar fasciitis?
Most people find three short sessions a week works best. Aim for a 30‑second glide along the heel‑to‑arch line, then follow with the quick stretches we covered earlier. If you’re just starting out, keep it to two days a week and watch how your foot feels. Once the morning “ouch” eases, you can add a third day, but never push beyond five minutes total per foot in a single sitting – the tissue needs time to recover between buzzes.
What speed and attachment are safest for the foot?
Start on the lowest speed setting – think of a gentle hum rather than a hammer. Pair that with the bullet‑shaped tip or a soft‑touch head. The small head slips between the arch and heel without digging into bone. If you notice any sharp sting, drop the speed a notch or switch to a softer attachment. The goal is a light “tingle‑and‑release,” not a painful jolt.
Can I use a massage gun on the plantar fascia if I’m in the acute pain phase?
During an acute flare‑up (that first‑step sting right after getting out of bed), it’s wiser to skip the gun and focus on gentle stretching, ice, and rest. Percussive therapy can aggravate inflamed tissue in that stage. Once the pain settles to a mild soreness, you can re‑introduce the low‑speed glide for 10‑15 seconds per pass, monitoring how your foot responds.
Do I need to warm up before I grab the gun?
Absolutely – a quick warm‑up primes the fascia. Spend 30‑60 seconds doing ankle circles, calf raises, or a light march in place. This boosts blood flow and makes the tissue more pliable, so the vibrations travel smoothly instead of hitting a tight knot. You’ll notice the buzz feels more like a massage therapist’s hand and less like a vibration on a stiff rope.
Should I combine the massage gun with other recovery tools?
Yes, layering recovery works wonders. After your glide, roll a small foam roller under your calf for 20 seconds, then do the towel stretch we described. Some athletes also add a brief ice pack (5‑10 minutes) if the foot feels a little sore afterward. The combination of percussion, stretch, and cold helps the fascia relax, reduces inflammation, and speeds up the healing cycle.
What’s the biggest mistake beginners make with a massage gun?
Staying in one spot too long. It’s tempting to linger over a tender knot, but more than 15 seconds on a single area can inflame the fascia or even bruise the heel bone. Keep each pass under 10‑15 seconds and move continuously from heel to arch, then back. If a spot feels extra tight, you can do a quick extra pass later, but never exceed a total of 30 seconds on any one point.
When should I see a professional instead of self‑treating?
If you notice sharp, lingering pain that doesn’t improve after a day of rest, swelling, bruising, or numbness that travels up the calf, it’s time to call a physiotherapist or podiatrist. Also, if you’ve had a recent fracture, severe sprain, or surgery on the same foot, avoid the gun until a professional gives the green light. A quick check‑in every few weeks can keep your routine on track and catch any red flags early.