
Recent Post

Grass Fed Whey Protein Isolate Powder: A Complete Guide to Benefits, Selection, and Use

Whey Isolate for Lactose Intolerance: A Practical Guide to Safe Protein Supplementation

Lactose Free Whey Protein Isolate: Complete Guide to Benefits, Brands, and Usage

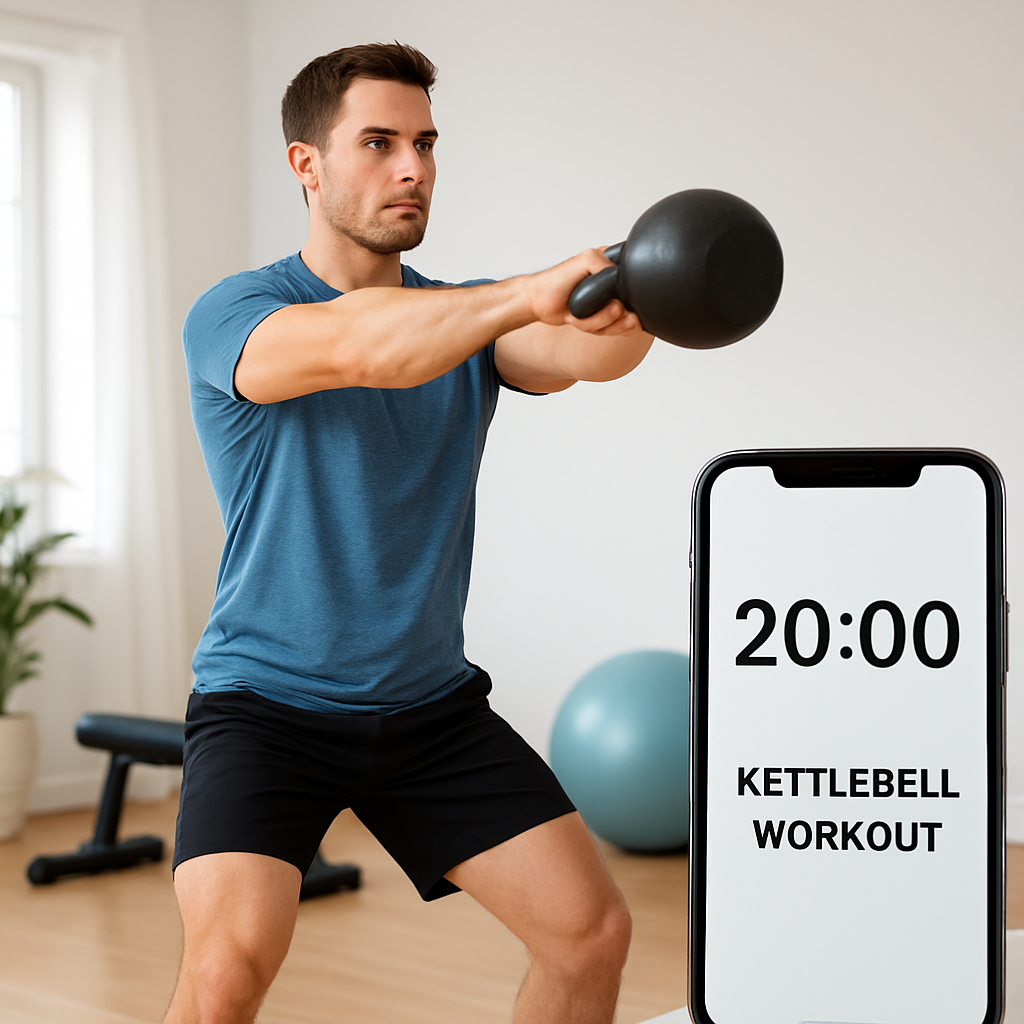
20 minute kettlebell workout for beginners: A Step‑by‑Step Guide

Adjustable Kettlebell 40 lb: Complete Buying, Setup, and Workout Guide

Smart Shoppers' Black Friday List: 10 Must-Have Deals and Tips
Leave a comment
20 minute kettlebell workout for beginners: A Step‑by‑Step Guide
Ever stared at a clock and thought, “I’ve got just 20 minutes, can I really get a solid kettlebell session in?” – you’re not alone. Most beginners worry that short workouts won’t move the needle, but the truth is a focused 20‑minute kettlebell routine can torch calories, boost strength, and leave you feeling energized. Let’s break down why this bite‑size format works and how you can nail it.
The magic lies in high‑intensity intervals. When you swing, press, or squat with a kettlebell, you recruit multiple muscle groups while keeping your heart rate up. Studies show that 20 minutes of kettlebell training can burn roughly 200‑250 calories, comparable to a 30‑minute jog, because you’re constantly moving and engaging your core.
Here’s a quick snapshot of a beginner‑friendly circuit: 30‑second swing, 30‑second rest, 30‑second goblet squat, 30‑second rest, 30‑second single‑arm press (switch arms), 30‑second rest, repeat three rounds. The total adds up to exactly 20 minutes, including a short warm‑up and cool‑down.
Real‑world example: Sarah, a busy mom of two, swapped her evening TV habit for this routine. She set a timer, grabbed a 12 kg kettlebell from her kettlebell collection, and followed the circuit while her kids did homework. After four weeks she reported less lower‑back soreness and a noticeable lift in her energy levels.
If you’re new to kettlebells, start with a weight that lets you complete the movement with good form—typically 8‑12 kg for women and 12‑16 kg for men. The goal isn’t to lift heavy; it’s to maintain control and keep the pace steady. Remember, quality beats quantity every time.
Actionable step 1: Warm up for three minutes. Do arm circles, hip hinges, and bodyweight lunges to wake up the joints. This primes your muscles and reduces the risk of strain.
Actionable step 2: Set a timer or use a simple interval app. Work intervals should be timed to 30 seconds on, 30 seconds off. The rest period is crucial for recovery, especially when you’re just starting out.
Actionable step 3: Focus on the swing first. It’s the cornerstone of kettlebell fitness, teaching hip hinge mechanics that protect your lower back. Imagine pushing the ground away with your hips, not pulling with your arms.
Actionable step 4: Transition to the goblet squat. Hold the kettlebell close to your chest, sit back into a squat, and keep your knees tracking over your toes. If you feel your knees caving, narrow your stance slightly.
Actionable step 5: Finish with the single‑arm press. This adds an upper‑body challenge and improves shoulder stability. Switch arms after each round to keep things balanced.
After the circuit, cool down for two minutes with gentle stretching—focus on hamstrings, shoulders, and the lower back. Hydrate and consider a recovery aid. For instance, many athletes find that wearing a dedicated recovery T‑shirt helps reduce post‑workout soreness; learn more about these garments here.
Bottom line: You don’t need hours in the gym to see progress. A 20‑minute kettlebell workout fits into a busy schedule, builds functional strength, and keeps your metabolism revved. Grab a kettlebell, set your timer, and give it a go—your future self will thank you.
TL;DR
A 20‑minute kettlebell workout for beginners delivers a fast, full‑body burn that fits even the busiest schedule, with no equipment beyond a single kettlebell needed.
Just follow the simple swing, squat, and press circuit, keep rest short, and you’ll see strength and energy rise fast, and track progress each week.
Step 1: Warm‑up and Mobility for a 20 minute kettlebell workout for beginners
Before you even swing that kettlebell, give your body a quick invitation to move. Think about the last time you tried a new exercise cold‑out‑of‑the‑blue – odds are you felt a little stiff, maybe even a twinge of doubt. That’s totally normal, and a focused warm‑up wipes that uncertainty away.
Why a warm‑up matters
Three minutes of purposeful mobility does more than raise your heart rate; it activates the neuromuscular pathways you’ll rely on for the swing, squat, and press. When your hips are primed and your shoulders are rolling, you’ll notice smoother form, less strain, and a confidence boost that carries through every 30‑second interval.
Dynamic mobility routine
Grab a light kettlebell or just use your body weight. Move through each drill for about 30 seconds, keeping the tempo steady but relaxed.
- Arm circles – forward and backward, big enough to feel a stretch in the shoulder caps.
- Hip hinges – mimic the kettlebell swing motion, pushing the hips back while keeping a neutral spine.
- World’s greatest stretch – lunge forward, rotate the torso, and reach the opposite arm overhead. It opens the hip flexors and thoracic spine in one fluid motion.
- Bodyweight lunges – step forward, drop the back knee, and pulse gently. This wakes up the quads and glutes you’ll lean on during goblet squats.
Feel each joint glide, and if something feels tight, spend an extra few seconds on that area. The goal isn’t to tire you out – it’s to make the upcoming 20‑minute kettlebell workout feel like a natural extension of your body’s rhythm.
So, what’s the best way to keep this warm‑up from feeling like a chore? Put on some music you love, imagine you’re prepping for a fun challenge, and keep the movements fluid. A little humor helps too – “If my hips were a door, I’d definitely be greasing the hinges now.”
Once you’re feeling loose, it’s time to watch a quick visual guide that walks you through each mobility drill. This video breaks down the tempo and shows the exact range of motion you want.
Notice how the instructor cues a smooth hip hinge before each swing – that’s the cue you’ll want to echo throughout the circuit.
After the video, give yourself a moment to breathe, then transition into the first set of swings. If you notice any lingering tightness in the shoulders or lower back, consider a quick post‑workout recovery aid. Many athletes swear by recovery t‑shirts that use gentle compression to speed up muscle repair.
And if you’re ever unsure whether a particular mobility drill is right for you, or you feel persistent discomfort, it never hurts to get a professional opinion. A trusted clinic like Family‑focused Naturopathic Practice can offer personalized guidance, ensuring you stay safe and progress steadily.
Finally, here’s a quick checklist to run through before you hit the timer:
- Warm‑up timer set for 3 minutes.
- All mobility moves performed with controlled breathing.
- Video watched and key cues noted.
- Recovery plan (stretch, hydrate, maybe a recovery tee) ready for post‑session.
With this prep in place, you’re not just starting a workout – you’re setting a foundation for consistent, injury‑free progress. Let’s move on to the swing itself, confident that every joint is ready to roll.
Step 2: Mastering the Core Kettlebell Moves
Now that you’ve loosened up, it’s time to bring the kettlebell back into play and focus on the moves that actually make the 20 minute kettlebell workout for beginners count.
Ever feel like you’re just flailing with the weight, not sure which muscles you’re firing? That’s why we zero in on four core patterns that together give you a full‑body blast without guesswork.
1️⃣ Two‑second swing
Start with the bell on the floor, hinge at the hips, then snap the hips forward so the kettlebell swings up to chest height. Keep the arms relaxed – they’re just a hook.
Tip: if the bell shoots too high you’re pulling with the arms; if it stays low you haven’t fully driven the hips.
2️⃣ Goblet squat
Hold the kettlebell at your chest, sit back like you’re lowering into a chair, and keep knees tracking over toes.
Breathing cue: inhale on the way down, exhale as you push up to lock the core.
3️⃣ Clean & Press
The clean‑and‑press merges a hip‑driven clean with a strict overhead press, hitting glutes, core, shoulders and grip in one flow. Swing, pause at chest, “catch” in the rack, then press overhead.
Make the clean quiet; a noisy “clank” means you’re pulling with the arm instead of the hip. Greg Brookes explains why a clean‑and‑press is a time‑efficient full‑body builder.
4️⃣ Single‑arm press
From the rack, press the kettlebell straight up, lock the elbow, then switch arms after each round.
Pro tip: slightly protract the shoulder blade at the top – it adds stability to the lockout.
Putting the moves together
During each 30‑second work interval move from swing → goblet squat → clean & press (or clean + press if you need a split) → single‑arm press. The aim isn’t speed; it’s a smooth chain that keeps your heart rate up.
Set a timer for 30 seconds on, 30 seconds off. Use the off‑time to reset your breath, shake out the arms, and prep the bell for the next round.
Common pitfalls
Hunching forward on the swing? Your hips probably aren’t fully hinging – add a few extra hip‑hinge drills before the circuit.
Wobbling on the squat? Lighten the weight or widen the stance a bit; stability beats depth while you’re mastering form.
Struggling with the clean? Try the “clean‑pause‑press” drill: swing, pause at chest, then press. The pause forces a clean, quiet rack before the overhead work.
If 8 kg feels heavy for the clean, drop down to 6 kg or even a kettlebell filled with sand. The swing, squat and press all scale the same way – lighter weight lets you focus on hip drive and core tension, while a heavier bell builds power once the pattern feels solid.
These four moves hit the big muscle groups you need for functional strength, keep your heart rate in the fat‑burn zone, and fit neatly into 30‑second intervals, so you can finish the entire circuit in exactly 20 minutes without feeling rushed.
Remember, consistency beats perfection – hit these moves three times a week and watch your confidence grow.
Give these moves a go, and you’ll notice the swing feels smoother, the squat steadier, and the press more controlled. That’s the magic of mastering the core kettlebell moves – they turn a short 20‑minute session into a purposeful, full‑body workout you actually look forward to.
Step 3: Building the 20‑Minute Circuit Structure
Alright, you've warmed up and you know the swing, squat, clean‑and‑press, and single‑arm press. Now it's time to stitch those moves together into a tidy 20‑minute circuit that feels doable even on the busiest days.
First thing's first: grab a timer. A simple phone timer or any interval app works fine – you don't need fancy gear. Set it for 30‑second work periods followed by 30‑second rest. That gives you exactly the cadence we used earlier and keeps the heart rate humming without burning you out.
Lay out the round order
We’ll run three rounds of four moves each. The sequence goes swing → goblet squat → clean‑and‑press → single‑arm press. Keeping the order consistent helps your body develop a rhythm, so you spend less mental energy thinking about “what's next?” and more energy actually moving.
Round 1 starts with the swing. Hit the bell hard for the full 30 seconds, then rest while you shake out your arms. When the timer pings, move straight into the goblet squat. Remember to sit back into a chair‑like position – think of pulling your hips down, not just bending your knees.
Round 2 repeats the same pattern, but try to shave a second or two off any unnecessary pauses. By the second round you should feel the groove, and the rest intervals will feel like brief breaths rather than full stops.
Adding a “progression” twist
If the basic 30/30 feels too easy after a week or two, sprinkle in a small progression. For example, increase the swing height to eye level, add a pulse at the bottom of the squat, or press the kettlebell a half‑second longer before you lower it. These micro‑adjustments keep the workout challenging without extending the total time.
Another easy hack is to shorten the rest by five seconds after you’ve nailed the form. So you’d swing for 30, rest 25, squat 30, rest 25, and so on. Just be honest with yourself – if your form starts to wobble, go back to the full 30‑second breaks.
Does this feel overwhelming? Not at all. Think of each 30‑second block as a mini‑sprint, and each rest as a quick sip of water. The whole thing adds up to exactly 20 minutes: 4 moves × 30 seconds × 3 rounds = 12 minutes of work, plus 12 seconds × 8 rests = 8 minutes of recovery.
Checklist before you start
- Timer set to 30‑second intervals
- Kettlebell within reach (8‑12 kg for most beginners)
- Clear space – enough room to swing safely
- Water bottle nearby for the brief rests
Got all that? Great. Now hit “start” and trust the structure. If you stumble on a move, pause, reset, and keep the timer running – the rest period is there to let you regroup.
One last tip: after each full circuit, take a quick 30‑second “body scan.” Notice any tight spots, shake out your shoulders, and maybe add a few extra hip‑hinges if you feel stiff. That tiny habit turns a routine into a mindful practice.
So there you have it – a straightforward, repeatable 20‑minute circuit you can slot into any day. Give it a go, track how many rounds you can finish cleanly, and watch your confidence grow with each session.
Remember, consistency beats perfection – stick with this circuit three times a week and watch real progress.
Step 4: Modifications, Safety, and Common Mistakes
Alright, you’ve got the timer set, the kettlebell within arm’s reach, and the basic circuit humming. Before you start piling on reps, let’s talk about the little tweaks you can make to keep the workout friendly for your body, and the pitfalls that creep in when we’re moving fast.
Modifying the 20‑minute kettlebell workout for beginners
If the standard 30‑second blocks feel too intense, simply trim the work interval to 20 seconds and extend the rest to 40 seconds. You still hit the same movement pattern, but the extra recovery lets you focus on form.
Another easy tweak is to swap the single‑arm press for a two‑handed overhead hold. Hold the bell overhead for the full interval, then rest. This reduces shoulder strain while still challenging core stability.
Got limited space? Perform a “half‑swing” – a hip‑hinge motion that stops at chest height. It gives you the hip‑drive without needing a full arc, and it’s gentler on the lower back.
Safety checklist before every round
1. Grip check: your hand should wrap around the handle, thumb wrapped, wrist straight. A loose grip invites the bell to wobble and can stress the wrist.
2. Hip‑hinge first: before you even think about the swing, practice a few hip‑hinges without weight. This reinforces the power source and protects the spine.
3. Neutral spine: keep your chest up, shoulders back, and core engaged. If you feel a rounding in the lower back, pause the set and reset.
4. Foot placement: feet shoulder‑width apart for swings, slightly wider for goblet squats. Even weight distribution helps you stay balanced.
Common mistakes (and how to fix them)
One of the most frequent errors is using the arms to pull the kettlebell up instead of driving from the hips. When the swing feels like a biceps curl, you’re missing the hip explosion and loading the shoulders unnecessarily. A quick cue: think “push the floor away with your hips,” not “pull the bell up.”
Another classic slip is leaning back too far at the top of the swing, which can compress the lower back. The bell should finish upright, shoulders square, and your core braced – like you’re standing tall in a plank. This cue aligns with what Greg Brookes highlights as a common kettlebell mistake: over‑relying on the shoulders and letting the hips lag.
Wrist pain often stems from holding the bell in an awkward, cocked position. Keep the wrist straight, elbow tucked, and the bell close to the chest in the rack. If the wrist still hurts, try a smoother‑finished kettlebell (cast‑iron with a smooth handle) or reduce the weight.
People also rush the goblet squat, letting the knees cave in or the heels lift. If that happens, widen your stance slightly, push the knees outward, and make sure you’re sitting back into a chair‑like position.
When to scale back
If you notice any sharp pain, especially in the lower back, shoulder, or wrist, stop the set immediately. Drop the weight by 2–4 kg, or replace the movement with a bodyweight version (air swing, air squat) until you regain confidence.
For beginners who are still mastering the swing, replace the 30‑second swing with a “hip‑hinge march”: hinge, then lift one foot off the ground for a few seconds, alternate. This builds the hip pattern without the ballistic load.
Progression ideas
Once you’ve nailed the basics, add a small challenge: increase the swing height to eye level, add a pulse at the bottom of the squat, or hold the kettlebell overhead for the last 10 seconds of the press interval. Just be sure each addition feels controlled – quality always beats quantity.
Finally, give yourself a quick “post‑set scan.” After each round, stand tall, take a breath, and ask: “Did anything feel tight or wobbly?” A minute of gentle shaking or a few extra hip‑hinges can reset tension before the next round.
By tweaking intervals, respecting safety cues, and steering clear of these common missteps, your 20 minute kettlebell workout for beginners stays effective, enjoyable, and injury‑free. You’ve got the tools – now go have some fun with the bell!
Step 5: Sample 20‑Minute Routine (Includes Table)
Alright, you’ve mastered the moves and you’ve got a timer ticking. Let’s stitch everything together into a concrete, 20‑minute session you can actually follow on a busy weekday. The idea is simple: four moves, 30‑second bursts, 30‑second rests, repeated three times. That adds up to exactly 20 minutes of work‑and‑recovery.
How the clock breaks down
Think of each 30‑second block as a mini‑sprint. You’re not trying to rack up reps; you’re focusing on quality, tempo, and keeping the heart rate humming. The 30‑second rest isn’t a break to chat – it’s a reset for your breathing, grip, and posture before you jump back in.
Quick checklist before you start
- Timer set to 30‑second intervals (most phones have a built‑in interval timer).
- Kettlebell within arm’s reach – 8–12 kg for most beginners.
- Clear floor space, at least a 4‑foot square.
- Water bottle nearby for a sip during each rest.
Got that? Great. Here’s the exact flow you’ll follow.
Step‑by‑step routine
Round 1
- 30 s kettlebell swing – drive from the hips, let the bell swing to chest height.
- 30 s rest – shake out your arms, take a deep breath.
- 30 s goblet squat – chest up, sit back into a chair.
- 30 s rest – roll your shoulders, keep the kettlebell ready.
- 30 s clean & press – clean to rack, press overhead.
- 30 s rest – reset grip.
- 30 s single‑arm press – press, switch arms after the interval.
- 30 s rest – stand tall, shake out any tension.
Repeat the same eight‑step block two more times. By the end you’ll have completed 12 minutes of work and 8 minutes of rest, totalling 20 minutes.
Want to see why this interval style works? SELF explains that time‑based intervals let you focus on form over reps, keeping cardio and strength blended. That’s the sweet spot for beginners who need both endurance and technique practice.
Progression tweaks you can add
If the basic circuit feels easy after a week, try one of these micro‑adjustments – they add challenge without lengthening the workout.
- Raise the swing to eye level instead of chest level.
- Insert a 5‑second pulse at the bottom of each goblet squat.
- Hold the kettlebell overhead for the final 5 seconds of the press interval.
- Trim the rest to 25 seconds once you’re comfortable with the tempo.
Remember, quality always wins. If your form starts to wobble, revert to the full 30‑second rest.
Real‑world examples
Sarah, a marketing coordinator, uses the same routine during her lunch break. She keeps a 12 kg kettlebell on her office shelf, sets her phone timer, and powers through the eight‑step block twice. After four weeks she noticed a steadier mid‑day energy spike and a tighter core.
Meanwhile, Alex, a freelance photographer, swapped the 30‑second rest for a quick 10‑second “shake‑out” and a 20‑second breathing pause. He says the shorter pause keeps his heart rate up, making the 20‑minute session feel more like a cardio burst than a strength class.
Both stories illustrate that the routine is flexible enough to fit a coffee‑shop desk or a tiny apartment floor.
One more tip from a kettlebell trainer: Seacoast Kettlebell notes that the bell’s offset weight forces your core to stabilize, delivering a “total‑body” effect in every swing. That’s why you don’t need a whole rack of dumbbells – the single bell does the heavy lifting for you.
Table summary
| Move | Work (seconds) | Key tip |
|---|---|---|
| Kettlebell swing | 30 | Hip‑hinge drive, bell to chest height |
| Goblet squat | 30 | Chest up, sit back, knees over toes |
| Clean & press | 30 | Quiet rack, press overhead, switch arms each round |
Use this table as a quick glance while you’re moving. If you’re unsure about any cue, pause the timer, check your posture, then hit start again.
Finally, finish with a 2‑minute cool‑down: gentle hamstring stretch, shoulder rolls, and a few deep breaths. That tiny recovery window helps your nervous system settle and reduces post‑workout soreness.
There you have it – a plug‑and‑play 20‑minute kettlebell workout for beginners that you can drop into any day. Grab your bell, set the timer, and let’s get moving.
Step 6: Benefits of Kettlebell Training for Beginners
Ever wonder why a single 12 kg bell can feel like a whole gym in your living room? That’s the magic of kettlebell training – it forces your body to work as a unit, so you get strength, cardio and mobility all at once.
First off, the swing is a powerhouse for your posterior chain. When you drive the hips forward, you’re recruiting glutes, hamstrings and lower back, which translates to a stronger lift and less chance of a sore back later. That hip‑hinge pattern also spikes your heart rate, giving you a HIIT‑style calorie burn without the treadmill.
Speaking of calories, a 20‑minute kettlebell circuit can torch roughly 200‑250 calories, comparable to a 30‑minute jog. The high‑rep, whole‑body nature keeps oxygen demand high, so you’re burning fat while building muscle (Men’s Health explains how kettlebell swings boost power and endurance).
But it’s not just about the numbers. Because the weight sits off‑center, every press, squat or clean forces your core to stabilize. That unilateral load improves trunk stability and balances out left‑right strength gaps (Healthline notes kettlebells target several muscle groups at once).
Functional strength you can actually use
Think about the last time you lifted a grocery bag or chased after a kid. Those real‑world moves rely on hip drive, grip and shoulder stability – exactly what a kettlebell workout teaches. The goblet squat, for example, gives you a safe way to practice proper squat depth before you ever load a barbell.
And because you’re switching arms on the press, you’re training each shoulder independently. That reduces the risk of one side dominating, which is a common cause of shoulder pain in traditional dumbbell routines.
Time‑efficient conditioning
With just three rounds of 30‑second intervals, you’re hitting both aerobic and anaerobic systems. The short bursts keep your VO₂ max climbing, while the rest periods let you reset form – a sweet spot for beginners who hate feeling “out of breath” for too long.
Another bonus: kettlebell training improves grip strength automatically. Every swing and clean forces you to hold onto the handle, so you’ll notice your hand endurance creeping up during everyday tasks like opening jars.
Recovery‑friendly and low‑impact
Because the movements are joint‑friendly (especially when you keep the swing hip‑driven instead of arm‑pulling), you can keep training even on days when your knees or shoulders feel a bit tight. Just dial back the weight or swap a swing for a “hip‑hinge march” and you still get the same muscle activation without the impact.
And let’s not forget the mental side. The rhythmic swing can be oddly meditative – you focus on the hinge, the swing arc, the breath. Many beginners report feeling less stress after a 20‑minute session, which is a nice side‑effect when you’re juggling work and family.
Bottom line
So, what does all this mean for your 20 minute kettlebell workout for beginners? You’re getting a full‑body strength boost, a cardio calorie burn, core stability, grip endurance and a quick stress release, all in the time it takes to brew a pot of coffee.
Next step? Grab your kettlebell, set the timer, and let those benefits roll in – you’ll be surprised how fast a single bell can change the way you move.
FAQ
What is a 20 minute kettlebell workout for beginners?
A 20 minute kettlebell workout for beginners is a short, timed circuit that combines a few fundamental kettlebell moves—usually the swing, goblet squat, clean‑and‑press, and single‑arm press—into 30‑second work bursts followed by equal rest periods. The idea is to hit every major muscle group, raise your heart rate, and practice solid form, all in the time it takes to brew a cup of coffee. Because the intervals are brief, you stay fresh enough to focus on technique rather than fatigue.
How often should I do this routine?
Most beginners see steady progress when they train three times a week, leaving at least one rest day between sessions. This frequency gives your muscles enough stimulus to adapt while allowing connective tissue and the nervous system to recover. If you’re juggling a busy schedule, you can even slot a single 20‑minute session on a weekday and a lighter “active recovery” walk on the other days. Consistency beats intensity, so aim for regular, manageable workouts rather than occasional marathon sessions.
Do I need a specific kettlebell weight?
Start with a weight that lets you complete each 30‑second block without breaking form. For most men, an 8–12 kg (18–26 lb) bell works; women often feel comfortable with 4–8 kg (9–18 lb). If the swing feels like you’re pulling with your arms, drop a size down. If you can’t reach chest height on the swing after a few rounds, try a slightly heavier bell. The key is hip‑driven power, not sheer heaviness.
Can I replace any of the moves if I have an injury?
Absolutely. If your shoulder hurts, swap the single‑arm press for a two‑handed overhead hold or a high‑pull variation that keeps the arms close to the body. A sore lower back can be managed by doing a “hip‑hinge march” instead of a full swing, which still trains the posterior chain without the ballistic load. For knee discomfort, replace the goblet squat with a chair‑sit‑stand or a wall‑supported squat. Always listen to pain signals and modify before the next round.
What equipment besides a kettlebell might help?
A sturdy timer (your phone works fine) is essential so you can stick to the 30‑second on/off cadence. A non‑slip mat protects your floor and gives you a consistent surface for hip hinges. If you struggle with grip, chalk or a pair of gloves can keep the handle from slipping. Finally, a water bottle nearby ensures you stay hydrated during those short recovery breaks.
How do I know I’m progressing?
Track at least one metric each week: the number of clean‑and‑press reps you can finish in 30 seconds, the height of your swing, or how comfortable you feel at the end of the circuit. You can also note how quickly your heart rate returns to normal during the rest periods. When you notice smoother transitions, fewer pauses, or a lighter kettlebell feels easier, those are clear signs that your strength, endurance, and motor‑skill memory are improving.
Conclusion
By now you’ve seen how a 20 minute kettlebell workout for beginners can fit into a hectic day and still deliver real results.
You’ve got the warm‑up, the core moves, the interval structure, and safety tweaks – all broken down into bite‑size steps you can actually follow.
So, what’s the next move?
Grab a kettlebell you already own or pick a lightweight option from FitCore’s collection, set a timer, and commit to three sessions this week.
Notice how the swing feels smoother, the squat steadier, and the press more controlled – those small wins add up to bigger confidence.
If a move feels shaky, dial back the weight or shrink the work interval; the goal is steady form, not flashy reps.
Remember to finish with a quick body scan and a few gentle stretches – that tiny cooldown helps your muscles recover and primes you for the next session.
Soon you’ll notice the kettlebell becoming a go‑to tool for everything from a quick morning wake‑up to a stress‑relieving break at work.
Stick with the routine, track one simple metric each week, and watch your confidence grow – that’s the real payoff of a solid 20 minute kettlebell workout for beginners.
Give it a try today and feel the difference.